幫我們的粉絲專頁按個讚!
GPG 全名為 GNU Privacy Guard 也可以簡稱為 GnuPG,這篇文章教你如何創建 GPG Key 並且設定簽署,可以確保 git commit 一定是本人!
創建 GPG Key
首先先下載適用於您作業系統的 GPG 工具 (點我前往下載頁),我是使用 Windows,所以下載 Gpg4win。
安裝過程全部預設就好!
安裝好後打開指令視窗,開始創建 GPG key。
GPG 有多個版本,不同版本指令不一樣:
- 2.1.17 或更高版本請輸入
gpg --full-generate-key - 低於 2.1.17 版本請輸入
gpg --default-new-key-algo rsa4096 --gen-key
首先會問你要使用的金鑰種類,這裡預設就好。
Please select what kind of key you want:
   (1) RSA and RSA (default)
   (2) DSA and Elgamal
   (3) DSA (sign only)
   (4) RSA (sign only)
  (14) Existing key from card
Your selection? 1
接著會問你想要用多大的金鑰尺寸,這裡打 4096。
RSA keys may be between 1024 and 4096 bits long.
What keysize do you want? (3072) 4096
Requested keysize is 4096 bits
然後指定這把金鑰的有效期限,如果沒特殊需求可以輸入 0,代表永不過期。
Please specify how long the key should be valid.
         0 = key does not expire
      <n>  = key expires in n days
      <n>w = key expires in n weeks
      <n>m = key expires in n months
      <n>y = key expires in n years
Key is valid for? (0) 0
Key does not expire at all
接著確認設定是否有問題,沒問題輸入 y。
Is this correct? (y/N) y
確認完後會要你輸入基本資料和安全密碼。
GnuPG needs to construct a user ID to identify your key.

Real name: your name
Email address: youremail@your.email
Comment:
You selected this USER-ID:
    "your name <youremail@your.email>"

Change (N)ame, (C)omment, (E)mail or (O)kay/(Q)uit? O
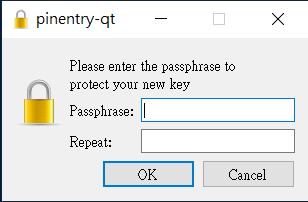
創建完畢後輸入 gpg --list-secret-keys --keyid-format LONG 列出同時具有公鑰和私鑰的 GPG key。
注意: Linux 上的某些 GPG 安裝可能會要求使用
gpg2 --list-keys --keyid-format LONG來查看現有的 Key 列表。
如果是這樣,還需要設定 Git,輸入git config --global gpg.program gpg2。
在列表中複製要使用的 GPG key ID,例如下方範例 GPG key ID 為 3AA5C34371567BD2。
------------------------------------
sec   4096R/3AA5C34371567BD2 2016-03-10 [expires: 2017-03-10]
uid                          Hubot
ssb   4096R/42B317FD4BA89E7A 2016-03-10
接著輸入 gpg --armor --export [你的 GPG key ID]。
它會輸出公鑰,複製貼到你的 Github / Gitlab / Bitbucket 等平台的 GPG Key 設定,從開頭 -----BEGIN PGP PUBLIC KEY BLOCK----- 複製到結尾 ----END PGP PUBLIC KEY BLOCK-----。
提交包含簽署的 Commit
接著是設定提交包含簽署的 Commit。
執行 git config --global user.signingkey [你的 GPG key ID] 設定 git。
- 如果你只想設定此專案改輸入
git config user.signingkey [你的 GPG key ID]
接下來在每次 Commit 時加上 -S 就可以簽署了。
也可以輸入指令 git config --global commit.gpgsign true 設定,這樣就不用每次都加 -S。
- 如果你只想設定此專案改輸入
git config commit.gpgsign true
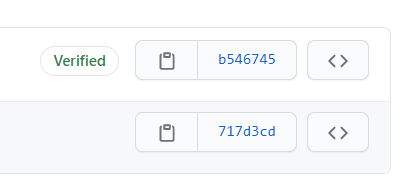
Push 上去後可以去檢查看看是否成功,GitHub 會在 Commit 紀錄中標示 Verified!
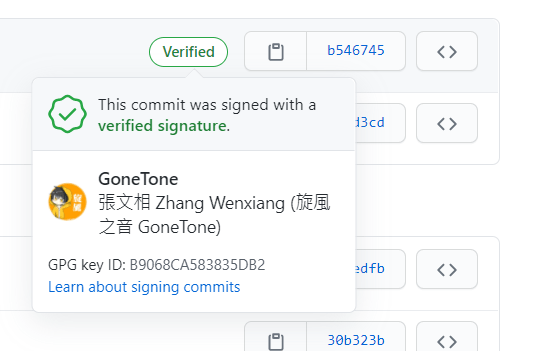
錯誤排除補充
如果您是使用 Windows,遇到以下錯誤訊息:
gpg: signing failed: No secret key
error: gpg failed to sign the data
fatal: failed to write commit object
輸入指令 git config --global gpg.program "C:\Program Files (x86)\GnuPG\bin\gpg.exe" 就可以排除了。 (路徑要注意,這是預設路徑,如果你安裝 GPG 時有改路徑,這邊記得修改)
張文相 Wenxiang Zhang
我是本站的站長,是一位 Web 工程師,喜歡 Coding XDD

