幫我們的粉絲專頁按個讚!
在 RouterOS 上安裝 VPN 服務商提供的WireGuard 設定檔
本次要將 VPN 服務提供商給的 WireGuard 設定檔安裝在 RouterOS 上
讓我們開始吧
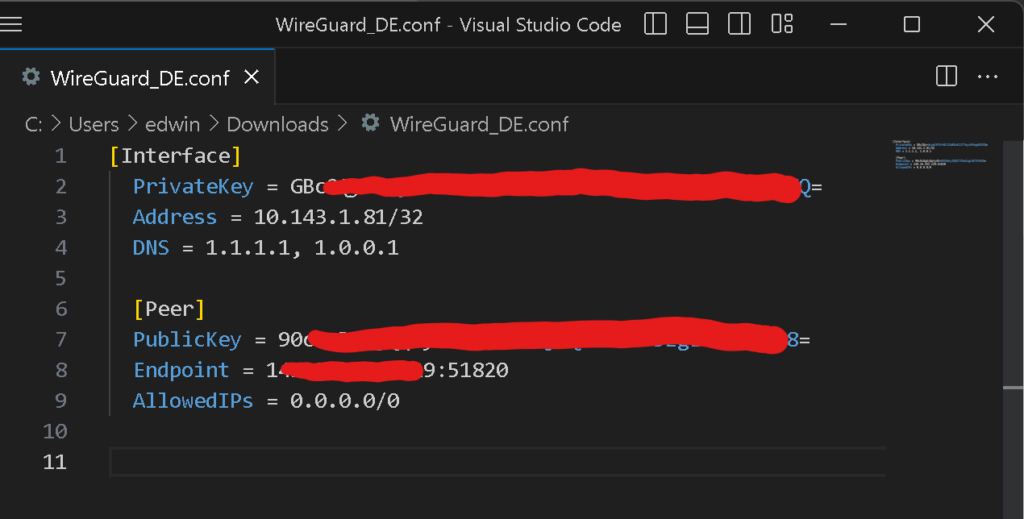
開啟 VPN 服務提供商給的 WireGuard 設定檔,將相關資訊留著備用

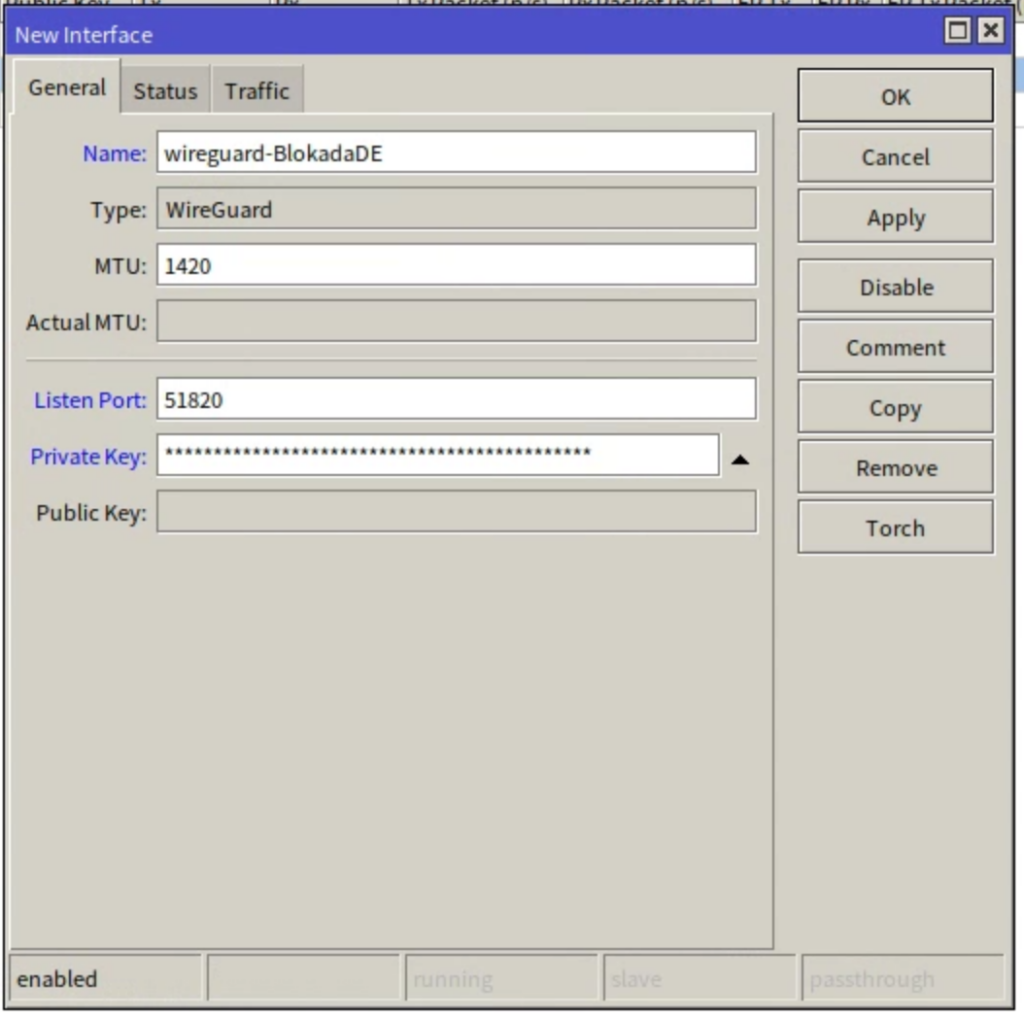
接下來前往 WireGuard>WireGuard>add
設定好名稱後,將 Port 填寫和 WireGuard 設定檔一樣,輸入 51820,而在 Private Key 欄位,將設定檔中的 PrivateKey 貼上後按下 OK 儲存

接下來前往 WireGuard>Peer>add
將 Interface 選擇剛剛新增的 WireGuard Interface,Publice Key 填入設定檔中的 PublicKey,Endpoint 填入設定檔中的 IP,Endpoint Port 填入設定檔中的 Port,Allowed Address 輸入 0.0.0.0/0

接下來前往 IP>Firewall>Filter Rules>add
接下來新增一個規則,讓流量可以使用 Port 51820
在 General 標籤下,Chain 選擇 input,Protocol 選擇 17(udp),Dst. Port 填寫 51820

在 Action 標籤下,將 Action 選擇 accept

接下來前往 IP>Address>add
將設定檔中的 Address 填入

大功告成,接下來可以透過以下方式進行測試
前往 Tools>Ping,透過剛剛新增的 WireGuard Interface 對外 Ping 看看是否有通

延伸閱讀
聽說有隻叫做夜空藍喵の夜喵
這位編輯懶到什麼自我介紹也沒打...

![[筆記] 在 RouterOS 上將特定裝置使用 VPN 進行傳輸 - 封面圖](https://blog.reh.tw/wp-content/uploads/2024/02/image-10.png)
![[筆記] 在 RouterOS 上建立 WireGuard VPN,並在 Windows 上進行連線 - 封面圖](https://blog.reh.tw/wp-content/uploads/2024/02/image-800x450.png)

